 |
In the previous section we came across a special layer called a floating selection, often simply referred to as a float. A float is a temporary layer that gets created automatically under certain circumstances and that can be explicitly created if needed. A float is a special type of layer. All other layers are disabled when a float is created, and nothing can be done with the other layers until the float is anchored. Although the other layers are disabled, almost all GIMP operations can still be performed on the floating layer.
Floats are sort of a throwback, a vestige of prehistoric times when the GIMP had not yet evolved into a layer-based tool. Back then, it was necessary to have floats because that was the only way to selectively process parts of an image. Now it is more effective to separate various image components into different layers, allowing you to more conveniently and effectively process and combine them. Nevertheless, as already noted, they are created automatically, so it is important to know how they work and what to do with them. There are basically three things about floats that you need to know: when they are automatically created, how they can be explicitly created, and how they are anchored.
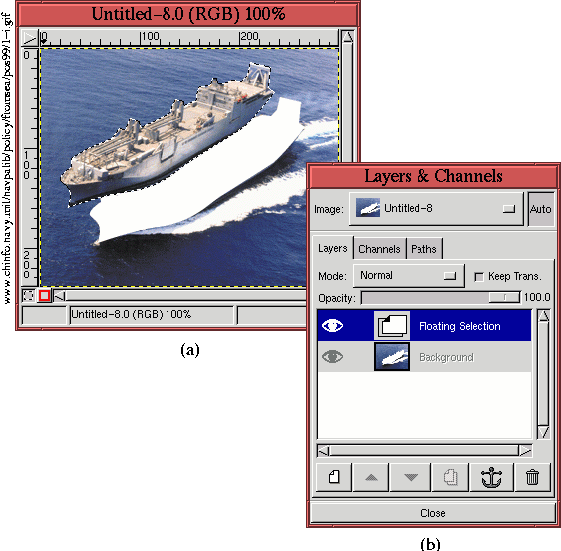
There are two circumstances under which floats are created. The first
occurs after you make a selection. After the selection is made, it
becomes immediately possible to move it (even without selecting the
Move tool). This is done by placing the mouse
cursor inside the selection (the cursor becomes a four-way arrow) and
by clicking and dragging. After you release the selection, it
automatically becomes a floating selection.
Figure 2.12(a)
The second way that a floating layer is automatically created is after a copy and paste or a cut and paste operation. Whether the default buffer contains a selection or an entire layer, pasting from the buffer produces a float.
A selection can be explicitly made into a float without moving it. This is done by using the Float function found in the Image:Select menu or by simply typing C-S-l in the image window. A good use for the explicit creation of a float is described in Section 2.6.2.
After a float has been created, normal operations cannot continue in the GIMP until the float is anchored. Anchoring is just the operation of depositing the float into a normal layer. Once this is done, the other layers become available for GIMP operations again. A layer can be anchored either to a new layer or to the last active layer before the float was created. A float is anchored to a new layer by selecting New Layer from the Layers menu or by clicking on the New Layer button in the Layers dialog. A float is anchored to the previously active layer by using the Anchor Layer function from the Layers menu, by typing C-h in the image window, or by clicking on the Anchor button in the Layers dialog.